
Table of Contents
Introduction
if you have ever done a construction job or worked in a masonry business, you have most likely worked with a standard claw hammer. It is the most common type of hammer, and it is usually the only hammer most people know how to use. However, if you’ve worked around hammers, you may know different types of hammers, but that doesn’t mean you know how every type of hammer is used. There are various hammers, and each of them performs different tasks, but the most common types are the claw hammer, sledgehammer, and the mallet because of how often they are used.
Types Of Hammers And Their Functions
Hammers come in different types, shapes, and sizes, and they all perform different functions, but the most common hammer is the claw hammer. The claw hammer is made up of a hammerhead, handle, and a claw at its back. The claw itself has a tiny gap in its middle, making it easy to use the claw as a wedge or lever while working. The claw hammer is a versatile and useful tool, which is why it can be found in almost every household, even if no member of the family works in construction.
Claw hammers are mainly used in nailing walls and boards, but they are also used to pull out nails from their anchoring material. They can also pull up pieces of wood, such as floorboards. If you need a hammer in your house, you should invest in a claw hammer. The claw hammer is very useful, but it cannot perform every task; if you are working on a project that requires more complex tools, you should get different hammers to make your work easier. Another hammering tool you can get is a mallet.

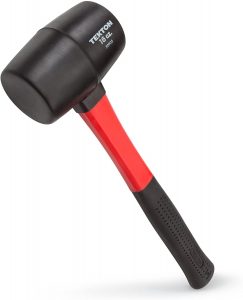
Mallets consist of a wooden blockhead placed on wooden handles. Mallets are used when you need to hammer a tool and don’t want to damage that tool. They are great for slow and controlled jobs such as carpentry. They allow you to do your job without damaging any of your tools or the material you’re working on. If you need a gentle tool to hammer, then mallets are your best choice, but sometimes you may be working on something that needs more striking force, which means you need a stronger tool. Most of the time, a sledgehammer is used to accomplish the harder tasks. Sledgehammers are mostly used in breaking strong materials such as stone, concrete, and other masonry materials.
Sledgehammers have an incredible striking force because of the way it is designed; they are able to break up any material they come in contact with. The best way to utilize a sledgehammer’s power is to swing it like an axe against the material to be broken.
Hammer Material Specification
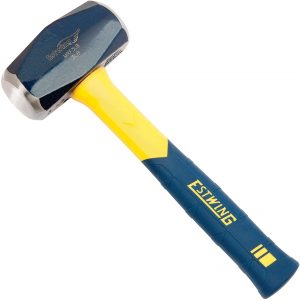
The style of a hammer determines the type of material that will be used in the making of that hammer. Most hammers are used to drive in nails or break up materials that are made from metal or wood, or any other durable material. But there are hammers used for light work such as a mallet, and they are made from less dense materials such as plastic, copper, or wood. The function of the hammer also determines the height of the hammer. Hammers used for heavy duty tasks are usually heavier, while hammers used for delicate precision tasks are usually lightweight.
The Process Of Manufacturing Hammers
The process of making a hammer is very precise; this is to make sure the tool is reliable and can handle any task it is used for. The process consists of three parts, and these steps must be properly followed. If the steps are not properly executed, the head of the hammer will not fit properly, and it may cause the head to fly off during use, which may lead to the hammer becoming ruined or causing bodily harm.
The Head
When it comes to making a hammer, the head is the first component to be made. Steel is heated up to a degree of 1,200 to 1,300 degree. This causes the metal to become soft, which makes it easy to mold. In order to make the hammer head, the molten steel is poured in the middle of two molds; one mold is stationary while the other one is joined to a metal rod that can be pushed against the mold. This is continuously done until the shape of the hammerhead has been formed. After that has been done, a few little finishing touches are carried out on the head, and then it is allowed to cool down.
The Handle
The next part of the hammer to be made is the handle. This is usually done by cutting down a piece of wood to the size specifications of the head. After you have done this, the wood will be sanded down, and then at the top of the handle, a slit is cut in a diagonal shape. After all that has been done, the wood is then treated and covered with a sealing coat. You could also decide to stain or paint the handle.
Assembly
After the hammer’s head and handle have been made, the next step is to assemble both parts by using a wedge. If the handle is wooden, it is simply just pressed into the bottom of the hammers head, known as the adze eye. The wedge is placed in the slit, which causes the handle to expand inside the slit, thereby firmly attaching the handle to the hammerhead; after all that, steel wedges may be driven across the handle to give it an extra expansion to hold the wooden wedge. However, ensure to check that the handle doesn’t get dislodged from its position.
Conclusion
Hammers are very useful and efficient tools that can be found in almost every household. You can find a hammer in every carpenter’s tool belt; they come in various sizes, shapes, and materials; these improve their functionality.
Also, see;