
Table of Contents
Introduction
Painting miniatures could be an exciting hobby to adopt; it allows you to turn a basic miniature into an amazing masterpiece. Many individuals also collect miniatures, thereby turning their hobbies into a trade where collectors pay you top dollar to get your miniatures. Painting miniatures can be a fun experience, which is why we have compiled a list of information on how to properly paint miniatures, whether you are a first-timer or a pro.
It is important to follow each step correctly to get the best possible finish. You could start by practicing your painting skill on a miniature that you don’t care about; this way, you can adapt and perfect your technique. Below is the step by step process of painting a miniature.
Preparing The Miniatures
Before you start painting a miniature, you need to clean it and ensure no old paint remains on the miniature. If you neglect this step, your result will be undesirable. If you want to remove old paint, the most common way to get rid of old paint is to use Pine-Sol cleaner, which has active pine oil to strip the old paint away. You can use this cleaner on all types of paint, such as acrylic, oil paint, enamel, and primer, and you can also use it to correct mistakes on your miniature. To get the best result, simply place the miniature in a glass jar filled with pine-sol and tightly seal the lid.
Allow the miniature to sit in the glass jar for 24hours and then remove it, scrub the old paint with a stiff toothbrush, and if the surface is tough, you may have to repeat the process. Make sure you conduct this process in a well-ventilated area. If the miniature you are working with is made out of plastic or resin, then soak it I pine-sol for about an hour.
Remember that even brand new miniatures need to be prepared before they can be painted; if this step is neglected the paint won’t stick to the miniature. Brand new miniatures are covered with a release agent that allows them to come out of the mold easily, but this leaves a powdered or oily substance on the miniature that needs to be removed
To get rid of the release agent, all you have to do is wash it up with a good liquid soap and warm water while using a hard toothbrush to remove every bit of the release agent from all the corners. Ensure that you take care when working with fragile miniatures or areas prone to breakings, such as a sword or spear. After completing this process, the minor extra details on the miniature will start to show, making you love it even more.
The next step in preparing includes getting rid of mold lines and flash lines. Flash lines are slight spurs found on the arms and feet of the miniature ad they are the aftereffect of the casting process. To get rid of this imperfection, all you have to do is use an Exacto knife to remove the excesses, and then use a jeweler’s file to file it down to get a perfect finish. However, a mold line is a line left on the miniature as a result of the miniature being cast in a two-part mold. For mold lines that are minor, you could use a jeweler’s file and file away the unwanted line.
Application Of Primer
The application of primer to your miniature before painting is a crucial step to take. Doing this will allow the paint to stick to the miniature without any stress. It will enable you to easily achieve the undertone for the main color. Also, suppose you intend on using acrylic paint on your miniature. In that case, the primer will ensure the paint stick to the miniature. Primers ensure that the paint properly sticks because acrylic paints find it difficult to stick to plastic, metal, or resin.
Make sure you lightly apply the primer because the miniature’s fine details will be destroyed if you use too much. Remember that primer’s color has to match the range of colors you intend on using on your miniature, taking into consideration if you want a light or dark ambiance. However, if you use a white primer, it will allow the main colors to shine brighter and look more vibrant.
Attaching The Miniature To The Base
After you have gone through the first two steps, you will need to attach your miniature to the base so that it can stand properly. The easiest and best way to attach your miniature to the base is by making use of a strong glue to hold your miniature in place. If you end up getting glue on areas that should be glued, you can easily get rid of the glue by using a de-bonder, such as a cyanoacrylate De-Bonder. It is advised that when you get your glue, you should also get a corresponding de-bonder, thus making sure you are prepared for anything.
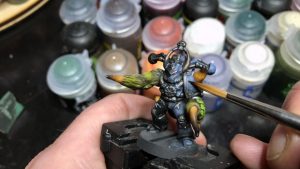
Paint Your Miniatures
After choosing the color scheme you want to work with, you can start painting your miniature. It is important to dilute the paint and make several thin coats of the paint. Using one thick coat will simply hide the finer details of your miniature, thereby ruining it. First, apply the paint to the deepest crevices and then work your way outward to cover the more visible areas.
Washing your miniatures to give them a shadow effect is another impressive technique that will benefit you to learn. This process is done using a thin color mixture that is darker than the base color to run through the cracks and creases on the miniature. When you are done painting your miniature, you should proceed by dry brushing your miniature. This process involves the highlighting of the elevated surfaces on the miniature, use a little bit of paint that is lighter on your paintbrush to paint the area. Paint across the grain of the miniature in order to get a perfect finish. The best brush for dry brushing is a flat brush.
After all that has been done, add your finishing touches to areas that it is needed. After it has dried, cover the miniature in a basic household white glue to give it a shiny finish.
Conclusion
Painting miniatures is an easy and satisfying hobby. Now that you know the process involved in painting a miniature, maybe you might be interested in taking it up as a hobby. Whether you’re a beginner or pro, this article will help you paint a miniature to perfection.