
Table of Contents
Introduction
Having to change a drill bit is probably one of the first things you should learn if you are just getting started using drills. One thing you should know is that it isn’t as difficult as it may appear on the surface, as you will get the hang of it in no time.
To guide through this process, here is a simple five-step guide. However, first, let’s first understand what a drill bit and the different types of drill bits available. Learn more on how to change a drill bit here
What is a Drill Bit?
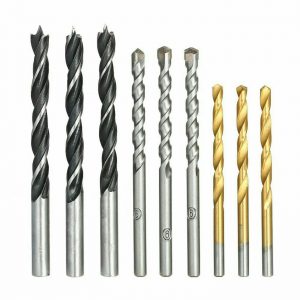
In straightforward terms, drill bits are those tiny pointy spiny things that shoot out of a drill. You have to push it into a material to make a hole. When spinning in the right direction, carpentry, woodworking, automobile, repair, remodeling, and even more can be used. There are different types of drill bits in terms of scale and design.
The Types of Drill Bit
- Cobalt Steel
- Solid Carbide
- High-Speed Steel
- Carbon Steel
- Tools Steel with carbide tips
Besides the core materials used on drill bits, there are several coating also applied on drill bits, including bronze oxide coating, black oxide coating, and titanium nitride coating.
Steps by Step Process To Changing Your Drill Bits
Here are the steps you need to take if you would want to change your drill bit yourself;
- Step One: Loosen the Chuck Up: A mechanism referred to as the drill chuck is there to hold the Bit. Thus it would be best to loosen it up to replace the current Bit with a new one. The procedure for loosening the chuck only requires that you rotate it in an anticlockwise direction. By applying some pressure, you unroll the chuck till the old Bit can be removed.
- Step Two: Take out the Bit: once the Bit is taken out, you would notice that the Bit might be wobbling. Hold the Bit using your fingers and take it out once it’s done. In a scenario where the bits had just been used, avoid using your bare fingers as it would too hot to hold. Use a protective glove to do so.
- Step Three: Take the New Bit and Set: Now, pick the size of the appropriate drill bit to place in the drill. Once you have the correct one, place the Bit’s smooth portion in the jaw of the drill. The smooth part should be the one that would be placed inside the chuck. When the Bit’s smooth portion is placed into the jaws of the chuck, inject the Bit into the chuck and return it towards you. The distance of the pullback shouldn’t be more than a centimeter.
- Step Four: Press the Trigger: You will need to give the trigger a few shots to ensure that the Bit is tightened in its appropriate position. You can achieve this by applying a little pressure on the trigger for 2 – 3 seconds. While on this, hold the chuck down with your other hand. This will ensure that the Bit is in position. Another thing to note is that holding it like this ensures that the Bit is correctly installed.
- Step Five: Check to see if there is any ratcheting mechanism: Some drill brands tend to come with a ratcheting mechanism installed in them. In such a case, what you need to do would be to work on the ratcheting mechanism to ensure the drill bit is firm. It would be best if you twisted the ratcheting to the drill bit’s shank to enable you to come up with this ratcheting mechanism. Once it clicks, you should know that it’s locked in position. Finally, to trigger the ratcheting mechanism, tightly spinning it next to the chuck. This spinning is should be in a clockwise motion.
Conclusion
If you followed the steps above, you should probably get the hang of how to change a drill bit yourself. Although there are other minor methods of changing drills, Bit uses the chuck key, so if your drill driver comes with one, you should incorporate the chuck case to get it done. Nevertheless, this is the most uncomplicated and most straightforward method of changing drill bits.