INTRODUCTION
A fresh coat of house paint may sometimes seem trivial, but, painting has both aesthetic and functional advantages. Painting gives your space an aesthetic value and objectively increases the home value as a recent painting can have a good effect on the final value. Switching up your wall colour can improve your mood and the overall appearance of your house. If you're feeling drab, new and bright paint could immediately bring life into your space.Painting may sound very easy and fun but can be quite tasking, especially if you rush right into it. To get a great painting result, there are few steps to follow to achieve it, but once you adhere to these steps, you will be able to paint like a pro. You’d learn about some of these steps in this article.
10 STEPS TO PAINTING A ROOM
- MAKE A PLAN
- CHOOSE A COLOR
- PAINT A SAMPLE SWTCH
- DETERMINE THE AMOUNT OF PAINT YOULL NEED
- PICK OUT YOUR TOOLS AND MATERIALS
- PREP THE WALLS AND THE ROOM
- MIX PAINT
- PICK YOUR PAINTING TECHNIQUE
- VENTILATE AND PAINT
- FINISH UP AND CLEAN
MAKE A PLAN: Before you pick up a paintbrush or purchase a paint, you need to plan your approach.
You ought to have a mental picture of what you want the finished look to be like. You can consider painting the ceilings, or if you want to try painting an accent wall.
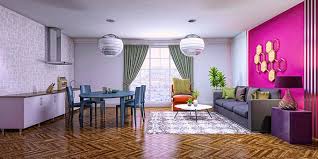
CHOOSE A COLOR: There is a vast range of shades and colours to choose from, and this can get overwhelming. You can start by choosing the general shade you'd prefer, for example, are you considering a warm shade or something dark or neon? This will surely help to narrow it down to some colours; then you should consider the colours of the furniture(if any) to help narrow it down further and then make a pick.
PAINT A SAMPLE SWATCH: Immediately you choose a shade and colour, get a sample paint to try it out to give you a better idea of how the colour will look in the designated space.
You can start by painting two coats on a foam board which you can easily get at any office supply or craft store. You then tape it to the wall to see how it looks.
DETERMINE THE AMOUNT OF PAINT YOU’LL NEED: You can determine the amount of paint you’ll need by using paint calculators. A lot of retailers have helpful paint calculators that you can use. Typically, a gallon is okay for 250 to 400 square feet, but don’t forget that you may need a little extra for some touch-ups.
PICK OUT YOUR TOOLS AND MATERIALS: Although the number of materials and tools you need primarily depends on the kind of project you want to carry out and also the size of the space but below is a list of some essential tools and materials that you should get.
- Paint
- Paint roller
- Paintbrushes including angled and straight
- Drop cloths
- sandpaper
- Paint tray
- Paint roller extension pole
PREP THE WALLS AND THE ROOM: Just before you dive into the process of painting, you should protect your furniture and other things in the room that you don’t want to smear paint on.
If you have limited space, push everything to the centre and cover the furniture with a lightweight plastic bag or a drop cloth. You can also simply take all the furniture out. Grab some painters tape and apply it to the edges of the spaces corners, crown mouldings, base, door and window casings. You can apply painters tape to protect switches and outlets from paint smear.
MIX PAINT: Next thing on the to-do list is mixing your chosen paint.
Use a wooden paint stick or spatula to stir the paint and keep stirring the paint throughout the process. If you're making use of more than one gallon of paint, pour the content of the cans into a big bucket or basin in case there is a slight difference in colour or shade.
PICK YOUR PAINTING TECHNIQUES: Now that you've mixed your paint and your roller is ready, you have to plan a strategy just before you get started.
Would you rather work from the top down, beginning with the ceilings? Are you planning an accent colored wall? Start painting the adjoining light-coloured walls first. If you intend to cover up dark walls with a lighter colour, plan on painting three coats which consist of your primer and two coats of the new colour. Do not rush; take your time. When using the roller to apply paint, use long strokes in a W pattern for full coverage, Once the wall is dry, you can dive in for the second coat.
VENTILATE AND PAINT: Don’t forget to make sure your space is well-aired and ventilated throughout the process and even after by making sure the windows are kept open and also making use of fans. The room should be airy and warm; this helps speed up the drying process. If the room is poorly-aired and damp, it'll take a very long while for the paint to dry and its also not safe for inhalation. Once the room is well-ventilated, you can begin painting, remember to take it slow for clean results.
FINISH UP AND CLEAN: Now that you’ve done multiple coats and done with painting, its time to add some finishing touches just before cleaning up. You can start by removing the painter's tape and gathering the drop cloths. Make sure the spills or splatters are dry before you try to remove them. Clean brushes with soap and water for latex and water-based paints while for oil-based paints, you may require mineral spirits. You may use a painters brush to reshape and clean bristles. Clean up your work area and tools, and you're good to go.