
Table of Contents
Introduction
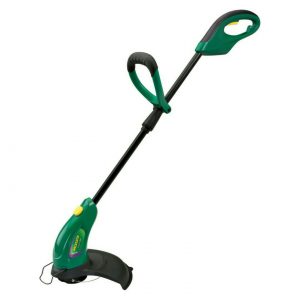
String trimmers go by several names such as “weed whackers,” “weed eater,” “weed whips,” and several other titles. String trimmers are nearly known as lawn tools and should be a big part of a lawn maintenance tool. String trimmer trimmers are popularly known because they are compact, inexpensive, and flexible. Most models that make us of gas can be used to cut, mow and edge flower beds, roads, fences, and driveways. You’ll need to learn how to operate your String trimmer safely to always have your yard clean.
But using a string trimmer can be simple, but it can also be risky. It’s convenient, and it’s useful for you. All you should do is hold the string trimmer, and these sorts of “monsters” will drive your enemies away from you. On the other hand, it is crucial to consider the danger while you hold the string trimmer and the best way to prevent injury.
Besides being quick and dangerous, you must also understand and try to remember all the essential steps to start the string trimmer and make it work. These days’ string trimmers can operate with gas or electricity thanks to a plugging cable. Most of these machines have manual and written shaft manuals, which will make it simpler for you to operate them.
And though these guidelines can be very comprehensive to implement suitably, they will help you understand and recall the process by heart. Below, we will show you how to start a string trimmer quickly and all the related details you will need to switch on your string trimmer.
Learn more on how to start a string trimmer here
Key Steps to Follow To Start Your String Trimmer
- Step One: Ensure You Get Prepared: Firstly, you must wear the appropriate gear, such as gloves and safety goggles. Gloves are necessary for you to securely hold the machine in your hand and have greater control over it. It would also help to prevent any unintentional slippage that may cause serious injury. You will need to wear safety goggles to shield your eyes from possible weeds, mulch, or dirt that appear to blow around as your machine does its job.
- Step Two: Locate the Ideal Terrain: You ought to observe the appropriate procedures to ensure your string trimmer is functioning correctly. They’re not like any other primary machine that starts running on a single button. To mitigate any potential risk, it is imperative to position the system on an open field without anything around it. So, as you set it to use, you’ll find it very convenient to drive the machine and cut the grass according to your desires.
- Step Three: Have the Fuel Tank Checked: It might sound like an extra or needless step, but like airplanes and cars that are tested before driving, you have to confirm if you’ve loaded the fuel tank with a string trimmer. String trimmers have a transparent deposit, making it much easier to see whether or not your machine has fuel. So, check it out. Then maybe you should take the next step. You could keep this move in mind when you’re using gas string trimmers. Nevertheless, for electrically powered string trimmers, all you have to do is charge the battery and connect when you want to use it.
- Step Four: Getting into the Main Job: After the very first three preventative measures, we’re ready to initiate eating our weeds. Firstly, don’t forget to switch the machine on. There’s an On-Off button, which is easy to find. Push it always before going to the next steps. On the engine component, be it on the left or the right. Depending on the model of the machine you’re using, you’ll see a visible rubber button that lets you detect the fuel. This button is dubbed the bulb primer. You have to push this bulb 5 to 10 times, based on the gas’s internal response through the lines from the container. The precise amount of pushing depends on the moment that the primer bulb begins to stabilize. Then you’re going to have to go to the next phase.
- Step Five: Check For Fuel Balance: When you’ve poured enough fuel into the carburetor, you’ll have to bear in mind if you’ve used it lately or kept it for a quiet time without using it. This move is essential because you will find a cold start switch on the choke button, which acts as a gear, and a third option between the first two is known as half choke. As we’ve already mentioned, if you’ve used your string trimmer recently, then the usual choke button would be enough as the motor appears to hold the inner energy required to start without pushing it hard. If you haven’t used your machine to leave, you need to adjust the choke button to the cold start mode. After that, you needed to push the throttle to achieve the correct equilibrium between the fuel and the air.
- Step Six: Pull the Rope to Start: If your string trimmer is on a cold start or a typical run, you’ll have to pull the rope multiple times before the string trimmer’s propeller starts running. If you moved the choke button to the cold run, it would be preferable to reduce one switch angle to the middle position. The engine will not be stressed this way. After that, you’ll have to pull the cord again, and the machine will start working. Now, the choke button can be moved to the usual run function.
- Step Seven: Enjoy your String Trimmer: Finally, if you’d like to start your string trimmer, you need to demonstrate a high degree of caution and hold the string trimmer to some particular regions. Typically, on the one hand, the right one, and it stays to the top part of the string trimmer, to the clutch button, and your left-hand remains at the circle, to the center of the string trimmer. You have to lift your string trimmer to the grass or weed level that you need to remove and drive across the lawn. Even these string trimmers are built with a protective plastic component to keep leaves and dirt from flying and crashing on your eyes and face.
- Step Eight: Maintain your String Trimmer: Your string trimmers will effectively cut and mow the grass on the tiny corners of your lawn. Where big machines that have wheels cannot, the string trimmer can do the job. What you need to do is take proper care of your device. Once the job has been finished, all you need to do is clean your string trimmer and clear all the soil and leaves that may have been trapped during the weeding operation. Maintenance is an effortless job. All you should do is purchase one of those cleaning agents used for string trimmers, use it to spray the entire surface of the string trimmer, and clean it for a few minutes. All the dirt will be off before you know it. Also, you’ve got to give particular attention to the propeller because that’s the part of your string trimmer that absorbs a lot of dust and dirt.
Conclusion
Starting your string trimmer is an easy thing if you do your due diligence to follow all the steps outlined above. The only drawback is the level of maintenance and care that should be given. However, if you are getting value from the machine, then it’s a no-brainer to spend some time maintaining what serves you.