
Table of Contents
Introduction
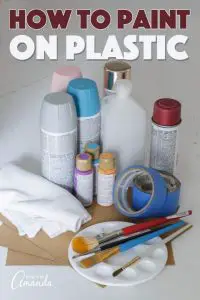
If you notice the plastic items in your house are dull and dated, or you just want a color change, then you could paint the items. Painting your plastic items makes them pop with fresh new colors and a smooth finish that will make that item look brand new.
Painting plastic is much more difficult than painting wood or concrete, but it is possible. Plastic has a smooth and non-porous surface, but materials such as wood have pores, allowing them to absorb paint. Because of plastics’ non-porous nature, paint tends to drip, pool and blotch, and after it dries, it is still easy to peel it off. The painted plastic usually has flaky and patchy finishes. However, manufacturers have made special spray paints that stay on the plastic without flaking and giving it a smooth finish. The majority of general purpose spray paints are suitable for painting plastics, but the surface must be well prepared. There is a process to follow in order to properly paint plastics.
Also, see;
Plastic Items That Can Be Painted
There are various kinds of plastic, and they all have their different compatibility with paint. If you prepare the surface of the plastic properly and use the right paint, you will get your desired result. However, some plastics are not suitable for painting.
They include plastic floors, kitchen countertops, and baths, and shower stalls. The paint doesn’t properly stick to them, and they are a potential health hazard, especially if it was painted with flaky paint. Every other type of plastic is suitable for painting.
Preparing The Surface Of The Plastic For Painting
Start by cleaning the plastic’s surface, use dish soap and warm water to clean the plastic, ensure you get rid of dirt or grease from the plastic’s surface. Rinse the soap away using freshwater and then dry it off; make sure it completely dries before starting the next step in the process.
The next step is to sand the surface lightly with sandpaper with a grit level of 220 to 300. This gives the surface of the plastic texture, which allows the paint to stick to it. This step is important because it makes a lot of difference in how the paint will turn out. After doing all that, clean the plastic with a cloth dipped in rubbing alcohol.
The alcohol will get rid of all the extra oil still remaining on the surface, which increases the chances of the paint sticking to the plastic. Ensure that you have your safety gloves on while you go through the steps to prevent oil from your skin getting on the plastic, as this could prevent the paint from sticking to the surface.
Priming The Plastic
The majority of paints won’t stick to plastic without any help; they require a primer’s aid. The primer is applied first to the surface to increase the paint’s chances of sticking to the plastic. The easiest primers to use are the spray-on type because they give you a smooth priming surface, but you can also use brush on primers.
No matter your choice, ensure that the primer properly dries before you start painting. It is important not to skip the priming step because it makes a difference, especially when painting non-porous surfaces. It lets the paint to stick to the non-absorbent surface.
Preparation Of The Paint
Before you can begin painting, ensure you have gotten the appropriate paint. Spray paints are the most used type of paints on plastic, with enamel and acrylic coming second. Make sure you check if the label says it is appropriate for plastic.
If you are using spray paint, make sure that you shake the can for about two minutes, it might seem like it is pointless, but it allows the paint to mix properly, thus giving you a smooth and adhesive paint. It is okay to apply acrylic paints straight out of the tin, but if you want a smooth surface, you can thin the paint with a bit of water.
Doing this reduces the presence of brush strokes and gives you a smoother final finish. It is also important to thin enamels, but do not thin it with water. Enamels have their special enamel paint thinner.
Painting The Plastic
Start by applying a thin coat; it doesn’t matter if it is properly covering the plastic because you will be adding more coats as you paint. Once the coat has been applied, allow it to properly dry before adding the next coat of paint.
After applying the second coat, ensure that you spray or brush in the opposite direction. If you applied the first coat in a horizontal direction, then switch to vertical movements for the second coat. After you apply the second coat and allow it to dry properly, you could apply a third coat if you feel that the coverage is not enough or smooth. The third coat will take a longer time to dry; leave it to dry for 24 hours before applying a sealant.
If you are using a spray paint, keep the spray can 12 to 28 inches away from the surface while spraying; ensure you spray in a smooth and sweeping motion. If you use a paintbrush, ensure that the brush is soft and apply the paint carefully in long motions.
Seal The Painted Plastic
The final step is using a coat of polyurethane sealant varnish to seal the plastic. Add a few light coats of the varnish and allow it to dry for 30 minutes between coats; this will give it a durable surface, thereby increasing its resistance to cracks and damage that affects painted plastics.
Conclusion
If you properly and carefully follow the steps mentioned above, you will be able to get the best possible finish. The paint may still flake, depending on the type of plastic, but it is unavoidable. The highlighted steps will allow you to properly paint plastic and provide you with a strong surface. There is no perfect plastic painting method, but you will get the hang of it with these steps.