

Table of Contents
INTRODUCTION
Of course, painted rocks are beautiful such that you want to use them to design your room, give them as gifts, or use it as a means of creating awareness. These well-designed rocks are great works of art. What could be more exciting is that you can learn how to paint rocks by yourself!
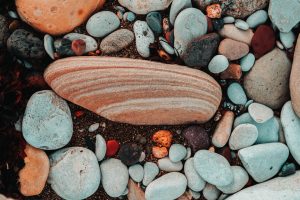
What kind of rock should you use?
To paint rocks, you need to select rocks that are smooth and flat. It is important to choose rocks that are free of ridges. Because you do not want a dull design. But, if during your search you are unable to find smooth rocks, then, you have to visit the craft store to get smooth rocks for a perfect design. If you get this, you are one step close to having a good painted rock.
Wash the rocks
After finding smooth rocks, you need to wash them. You must Wash off the dirt so that it doesn’t affect your design. No one wants a messy design!
You can simply wash the dirt by using liquid dish soap. Or set the stones in the sink for few minutes, then place them in a neat thick cloth to towel dry them. You can alternatively soak the rocks in a bowl of water so that sand particles or any dirt will fall off. Then, use a brush or sponge along with a block of mild soap to clean the rocks.
Now, set the rocks in a strainer to drain the water. And set out the rocks in a warm place or preferably in the sun to dry for at least 20 – 24 hours. When they’re totally dry, it’s time to start painting!
 But what if the rocks are waxy?
If you bought some rocks and you discover they’re waxy, then they aren’t suitable for painting. But, there’s a way out. Simply boil them first. Then, make use of a nail polish remover to wipe the rocks clean.
Seal or prime the rocks
You have to seal the rocks before painting it. Make use of a spray sealer. Some rocks are very absorbent so, it can consume your markers in just a little time. But when you seal the rocks it prevents that. You can also prime the rocks with white paint so that the colors applied to it will be luscious and shiny.
What type of paint should you use?
You might be puzzled about the type of paint to use to design your rocks. Well, acrylic is a good type. The acrylic paint comes in different brands. There are ones that are suitable for a variety of colors. And there are ones that are easy to apply. When they are applied, they become thick and do not require many coats. The acrylic paint is so versatile, and it’s suitable for painting rocks just as it is for painting miniatures
Go for simple designs
You can’t add a lot of details on rocks, so go for a non-complex design. Especially if it is your first time. Just make simple patterns, shapes, and simple curves like hearts, circles, or geometric shapes. The more you paint and design rocks, the better and experienced you’ll be. And you will be able to explore complex designs.
Do a paper practice
Before designing your rocks, draw out your design on the paper first. To do this, place the rock on the paper and draw out the shape of the rock. Then, make your desired design on the shape on the paper and choose what colors to use.
Highlight
If the rock is dark, make use of chalk for highlighting. Make use of a pencil if the rock is light. Then copy on your rock the design you made on the paper.
Type of colors
You should go for bright colors. Bright colors are really important especially if you bought dark-colored rocks it will be very luscious on them.
How to paint the rocks
After doing the above subject things, your rocks are ready to be painted and designed.
The design you want depends on what to use. For instance, you’ll need small-sized brushes or perhaps a stylus if you want to paint some little drawings and dots. Small-sized brushes are highly recommended. Brushes with different shapes such as round, liner, and rigger will help achieve a well-detailed painting.
After selecting the brushes, pour your desired paint into a palette or preferably a plate. If you’re using a palette, pour out at least a quarter of each paint into different sections. But if you perhaps are using a plate, see that you leave about 2 cm out of 5 cm distance between each color so that the colors don’t mix. And if you have to mix color, the colors should be side by side. Then, scoop each color with a different clean brush and put it on each other in the section for mixing or on a different plate. Take another brush to blend the colors.
You should use a separate paintbrush for each color. Using just one brush for all colors will give an entirely different color that you might not like or that doesn’t suit your design.
If you’re using different colors, make sure that one color dries before applying another one so that you have a non-messy painting.
Dry your rocks
After you’re done painting, set out your rocks to dry completely. The amount of paint you used will determine how long it will take to dry. You can just test it by slightly touching the rock with your fingertip. If the paint sticks to your finger, then you need to leave it to dry more.
You can sign your rocks if you want. Especially if you are selling it or if you’ll be participating in a competition with it. Simply use a thin mouthed brush to sign at the bottom of the rock.
Seal your rocks
When everything is done, make use of a spray sealer to seal your rocks. You should spray them in a free and ventilated place. The use of the rocks depends on the type of sealant to use. If it’s for outdoor use, specifically choose the spray sealer that suits that use. It would take about an hour or even hours for the sealant to dry it all depends on the size.
CONCLUSION
You probably have been wondering how to paint rocks. Now you see how easy it is. With just a few steps like choosing the right rocks, sealing, and designing your rocks you will be able to achieve well-designed rocks that will suit your purpose.