
Table of Contents
Introduction
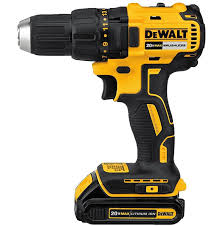
The drill is a handy power tool and is very common among homeowners and contractors. There are various brands of drills with many different features and variations; among these brands is the Dewalt drill. The Dewalt drill is the most popular and is incomparable. The Dewalt Company produces many tools like the ¼ inch, ½ inch, 3/8 inch drives and the speciality drills. There are different models of the Dewalt drill, each with its own difference, but they all work the same way and can be handled the same. The Dewalt Company is known to produce cordless drills with its patented battery system, and the batteries need to be charged before use. Drilling can be a hassle, especially when you don’t know how to use the drill. In this article, we would provide you with a step by step process on how to use the Dewalt drill properly.
Also, see,
How To Use A right Angle Drill?
How To Use The Dewalt Drill
Below is a step by step procedure on how to use the Dewalt cordless drill.
Charge the batteries
The Dewalt drill is cordless meaning a battery powers it, this means you have to charge the battery before using the drill. To charge the batteries, firstly plug the battery charger to an electrical outlet and connect it to the charger. The Dewalt drill has an indicator that shows you if the battery is charged or empty. You are sure the battery is charging when you see a blinking red light and fully charged when the light steadies. When the battery is fully charged, squeeze the sides of the battery to unplug the charger. To fix the battery, squeeze the sides of the drill and place it at the bottom of the drill. The battery will lock in place once the sides released.
Insert the drill bit into the drill
The first thing to do is to clutch the chuck and hold it tightly and then turn it counter clockwise or to the left. This helps to soften the chuck jaws so you can remove the bit from the jaws and examine it. Insert the bit back into the drill if it is in good shape, if it is damaged, you need to use a new bit. If you are using a new bit, hold the bit with your thumb and index finger, making sure the smooth end, the shank, is directed towards the chuck jaws. Insert the bit into the chuck jaws and then pull it back towards you immediately. Make sure not to pull it more than one centimetre. When the bit is set in place, you tighten it by turning the front of the chuck clockwise until the drill bit is tight. To make sure that the bit is fixed correctly, pull the trigger lightly while keeping the drill bit upright and then test it in full speed.
Set the torque
It is very common for people to focus more on the speed of the drill rather than the torque. That is very wrong because the speed of the drill has nothing to do with the force at which it drills; rather, the torque is what is needed. The torque is defined as the amount of force used to rotate an object. This means the force of the drill entirely depends on the torque. If you are using the drill on hard material, set the torque higher. It is essential to know the difference between high speed and high torque when using the Dewalt drill.
Start Drilling
This is the most important step. Check the side of the Dewalt drill for the forward/reverse button and then set the drill in a forward motion. When that is done, set the drill bit on the material and then squeeze the trigger lightly; this light pressure is so that the drill remains balanced on the material. When the tip of the drill bit gets into the material, squeeze the trigger harder. As the pressure is increased, you will notice an increase in the drilling speed. Release the trigger once you’ve reached your target depth. To remove the drill, set it in reverse motion, squeeze the trigger and pull the drill out of the hole.
Dewalt Drill Clutch Setting
The clutch is one of the important features adjusted while using the Dewalt drill. Adjusting the clutch setting determines the depth of the hole drilled into the material; it also improves the efficiency of the drill. The clutch is located at the front of the drill right behind the chuck. It is the part of the drill that has numbers on the ring and can rotate. The numbers are usually listed 1 to 10 or 20 depending on the size of the drill. The lower the number on the clutch, the tighter the clutch can hold the drill bit while you work. To set the clutch, align the arrow on the ring to your desired setting. Adjust the clutch to a higher number to increase the driving depth of the drill.
Safety Tips to Follow When Using A Drill
When using power tools like the Dewalt drill, it is essential to pay attention and protect yourself. Below are some of the safety precautions you can follow to prevent injury.
- Protect your eyes with safety goggles and wear a breathing mask especially when drilling materials that produce a lot of dust. You can also wear gloves to protect your hand
- Properly secure or clamp down your material before you start drilling
- Ensure that the drill bit is tightly set into the chuck. If it is a keyed chuck, make sure it is keyed to the chuck, if it is key-less, tighten the drill with your hand
- Make sure the drill is turned off before changing the drill bit. This is very important to prevent injury
Conclusion
Using the Dewalt drill is not as hard as it seems. Once you correctly read through the user’s manual and you follow the steps given in the article, then you are as good as a pro. The Dewalt Company produces powerful drills with strong and advanced brushless motors. There are different models of the Dewalt drill; they are all similar and can be handled following the steps in this article. For more, see